Showing posts with label sewing. Show all posts

Saturday, October 26, 2013

Happy Halloween!... almost.


 I usually wait until it's actually Halloween to post costume pictures, but seeing as I actually have internet access tonight, I suppose I better make use of it.

And so I present: Halloween Costumes 2013

Pippi Longstocking...

And a very sweet little bride. 


True to character, I have one dressed in lace and satin and the other looking super playful.

The Oldest read Pippi Longstocking recently, and helped design her own costume based on what she read. I love how it turned out, and so does she. She even did some of the sewing this year!

Littlest One really just wanted to be a princess (again) but I refuse to make the same costume twice. (Halloween costume sewing is as much fun for me as it is for them, mostly because I never get to make fun stuff like this in real life.) So instead of princess, she went with bride... which is essentially just a princess in white, with a veil and a bouquet. Works for me, and it turned out gorgeous.

The detail on the dress was the most fun I've had in a long time - I even designed it myself with a lace overlay on the front panel, ribbon woven corset-style up the front, and braid trim along the overlay and around the neckline. It really is a real wedding dress, in miniature.


And of course, the most fun comes after Halloween, when they can dress up as often as they want. Makes all the effort worth it in the end!

Happy Halloween to everyone!

Tuesday, November 1, 2011

Halloween Costume Cuteness

Sewing Halloween costumes is always great fun, and this year was no exception. The only change is that this year they're both old enough to decide for themselves what they want to be, and I had very little input. We do make the rule that there will be nothing evil, scary, or mean. That still gives them plenty to choose from.

We had a musketeer:


And a teddy bear:


They had a lovely time trick-or-treating, have far more candy than any children should be permitted to possess, and will now commence to use their costumes for dress-up play for many years to come. Perfect. :-)

Monday, September 12, 2011

Fall Dresses for Little Girls

I'm still on Housework Hiatus.

I finally gave in a bought Little Girls, Big Style by Mary Abreu. I've been eying it for some time now at the local fabric shop. And then I used it to make some dresses for Two Little Girls for fall.

Cora's is the Knotty Apron dress - an attached faux apron and knots instead of buttons on the straps. Love how it makes her look like a little peasant girl.


Chloe's is the Pocket Pinafore dress. I had to alter the pattern up a couple of sizes - the book only goes to a size 6. The straps attach with suspender clips.


I love the book, and highly recommend it. These patterns are super simple - primarily rectangles cut and sewn and gathered. Anyone who can sew a straight line could make these outfits without much difficulty. I will say that the amount of fabric called for was way more than what I needed. I have tons of leftover fabric.

The best thing to do with fabric leftover from little girl dresses?


Make doll clothes, of course!


I used an old McCall's doll clothes pattern, altered a bunch, to make exact replicas of the girls' dresses. Basking in the glory of being a mom to little girls. :o)

Thursday, July 21, 2011

Two Little Girls, Two Little Dresses

I have hardly sewed a thing this summer. Honestly, we've just been too busy, between camping and school and gardening and other summer activities. I haven't had enough free time to sit down at the sewing machine, or to pick up knitting needles.

And then I got really sad, because my kids are growing up so fast that I'm missing out on opportunities to make them cute things, and I put aside other less important things (like laundry, and mopping floors, and pulling weeds) and I sat down at the sewing machine with a stack of fabric and a few ideas bouncing around in my head.

This is what we ended up with.


Patchwork apron-style dresses with appliques on the bodices depicting the meaning of each girl's name.


Cora, derived from Kore, is sometimes used as a name for Persephone, a Greek goddess. You can Google the whole story if you want it (it's a good one), but Persephone is known for bringing spring to the earth each year - which I depicted in the form of a sunshine. It's also fitting since I always tell Cora she's my sunshine. And Cora also means "maiden" or "feminine", making pink the most obvious choice to accompany the yellow sunshine.


And Chloe, while also another name for the Greek goddess Demeter (who was Persephone's mother, and believe it or not, my choice in these names was completely unintentional), but Chloe also means "small green shoot." So fitting for all that this sweet little girl is.


The backs lace up corset style, with elastic in the back panels of the skirt. These dresses will fit for years.


The details: I used 1/4yd each of 6 fabrics for Cora's (size 4), and 1/3 yd each of 6 fabrics for Chloe's (Size 7.) I didn't follow a pattern, but didn't need one. A simple bodice shape is cut, plus the same shape for a lining. The two are sewn together and turned and topstitched. The skirt part is just 6 panels of fabric gathered a bit around the bodice with an elastic panel inserted in the back. I added ruffles and appliques and pockets because details are fun.

I love the result. Little girls in long dresses make me happy.


Saturday, February 19, 2011

The Singer


I love antiques. I don't love them for their monetary value, but for their historical value, the idea of where they've been and who has used them. I love what they stand for: an earlier, simpler time, a time when things were made to last instead of to be replaced when a new model was available. Most of the antiques I have, I use. My cheese grater is the old box metal variety, made before 1940. When my (newfangled) pastry cutter fell apart when I was making biscuits, I remembered there was a perfectly good old wire one hanging on my wall. I have and wear aprons made as early as 1910 - they still wash and wear beautifully. Old canning jars line my counter tops, storing dried fruits, spices and seasonings.

Two days ago, my aunt gave me an incredible gift:

Her fully operable antique Singer sewing machine. The serial number and a bit of research tells me it was produced between 1913 and 1915. It's in amazing shape, when you consider the fact that it's nearly 100 years old. Of course, it's also cast-iron - it won't be wearing out any time soon.


Of course, I couldn't see any good reason not to use it.

Have you ever tried sewing on a treadle sewing machine? It's sort of like riding a bike and sewing at the same time. Or rubbing your tummy and patting your head, with your feet rocking the treadle while your hands guide your fabric. It certainly takes some getting used to. I managed, though, after looking up some tips and hints on the best way to use it.


Sewing my first seam was thrilling. Sewing my first straight, neat, even seam (about 20 tries later) was even more thrilling. Now that I've (mostly) got the hang of it, I can't find too many reasons to go back to electric sewing. The treadle definitely gives you more control over every stitch. Of course, there is the fact that it lacks a zig-zag. And a button hole option. And the other 40 fancy decorative stitches that my electronic one does. But for most sewing, I think it's perfectly feasible to use this one. I like that it is quiet, that it fits conveniently in my living room, and that it doesn't need to be set near a plug. Mostly though, I'll use it because I just love the idea of it altogether.

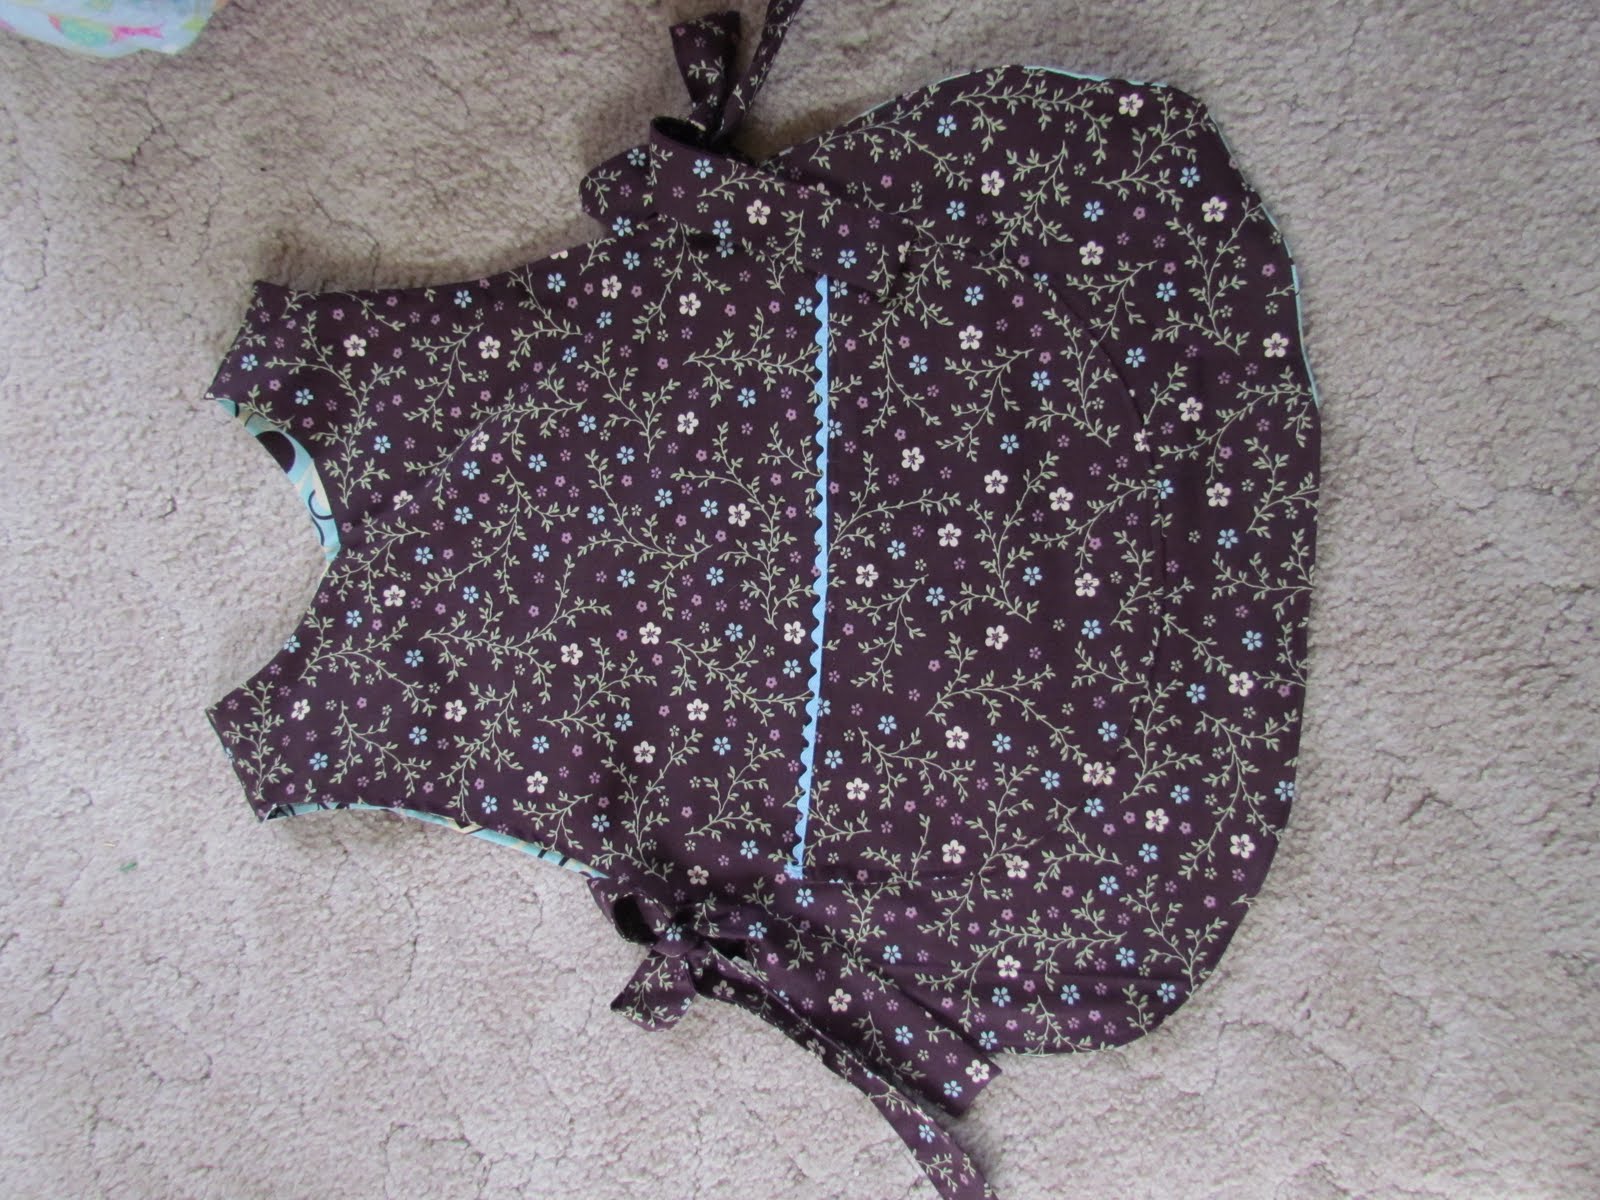
Of course, since I figured it out, I've been sewing obsessively. Which is nice, considering I haven't been in the mood to sew for months. I made an apron:

Smock-style, copied from a vintage one I bought at a yard sale, but altered to fit me a little better. For good measure (and because I couldn't decide on fabric) I made it reversible:

After that, I felt a little more confident in my ability to really control the machine... but only a little. So I made another apron:

Sewing all that bias tape around all those curves on a treadle sewing machine? Not the easiest thing I've ever done, but maybe the most tedious. I almost gave up, until I reminded myself that a good housewife in the early 1900's could make an entire Victorian gown on one of those machines, so there was no reason I couldn't manipulate a bit of bias tape.

This one is "The Waldorf" from the book A is for Apron by Nathalie Mornu, with my own hand-drawn pattern because I didn't want to pay to have the one in the book copied and enlarged. I'm giving this one to my aunt, as a way of thanking her for the machine and letting her know it will certainly be used.

And then I'll go back to the fabric store, because making aprons on a treadle sewing machine is apparently quite addicting, and I'm pretty sure I don't have enough aprons yet.


Sunday, December 19, 2010

An Early Christmas Present

"...Nellie asked, 'Don't you wish you had a fur cape, Laura? But your Pa couldn't buy you one. Your Pa's not a store keeper.'"


But on Christmas at the church...

Laura was too excited to speak. She squeezed Mary's hand tighter and tighter, and she looked up at Ma, wanting so much to know what that was. Ma smiled down at her and answered, 'That is a Christmas tree, girls. Do you think it is pretty?'...

...Just then, Laura saw the most wonderful thing of all. From a far branch of that tree hung a little fur cape, and a muff to match!...

The little fur cape and muff still hung on the tree, and Laura wanted them. She wanted to look at them as long as she could. She wanted to know who got them. They could not be for Nellie Oleson, who already had a fur cape...

...And suddenly someone said, 'These are for you, Laura.' Mrs. Tower stood smiling, holding out the little fur cape and muff...

...Laura could not speak. The golden-brown fur cuddled her neck and softly hugged her shoulders.


"'Merry Christmas, Nellie,' Laura said. Nellie stared, while Laura walked quietly on, with her hands snuggled deep in the soft muff. Her cape was prettier than Nellie's, and Nellie had no muff."

from On The Banks of Plum Creek
by Laura Ingalls Wilder


====

When we read that part a couple of months ago, Chloe's eyes were shining as she said, "Oh, I bet they were so beautiful." When she opened these, she knew exactly what they were: "It's a fur cape! And a muff! Just like Laura's!"


Details on the cape and muff:

I used a pattern for the cape: McCalls 4703. It was terribly easy, just about anyone could do it. I lined the fur with a matching satin on the inside so it's nice and soft and not itchy around her neck. Fur is - of course - misery to sew on. But worth it. I never did get my machine to make the buttonhole through like five layers of fur - I just made it by hand.

The muff I didn't use a pattern for. It's just two rectangles sewn facing one another then turned so it's fully lined with fur. I did put in a satin ribbon so that it will hang for her neck - because little girls tend to forget they're wearing such things and muffs and pull their hands right out. With the ribbon, it'll stay put even when her hands don't.


This whole project cost about $15 between the fur, satin (30% off), and pattern ($1 pattern sale.) With my goal for not giving my kids a bunch of plastic toys made in China this year for Christmas, homemade things fit right in. The fur is American made, and so is the pattern. I couldn't find any info on the bolt for the satin, but even if it's not American, two out of three isn't bad. Overall, a wonderful little project.

And now I get to be the mother of the little girl who goes to the grocery store wearing jeans, a t-shirt, and a fur cape and muff. Because we Miller girls are fashion-forward like that.


Saturday, November 6, 2010

A goose feather pillow - finally.

Back in March, hubby went on a goose hunt and came home with six geese. If you'll remember, I kept some of the goose feathers with the intention of making a pillow.

The first step in making a goose-feather pillow is to freeze any creepy crawlies out of the feathers. I filled a trash bag with feathers and stuck them in the freezer for two weeks. Then I pulled them out for a week (giving any remaining eggs a chance to hatch) and put them back in for another four weeks. At the end of this process, any lice, etc. are supposed to be dead. I hope.

The feathers then sat in my craft room until July, when I finally got around to making a muslin sack for them. Of course, Two Little Girls were more than happy to help stuff the pillow.


And then the plain muslin pillow sat for another three and a half months until today, when I finally got around to making a cute little pillowcase for it.


The inspiration for the pillowcase came from Sew Liberated - the book that also had the pattern for the cute little apron I made awhile back. Of course, I had to return that book to the library months ago, so I just worked from memory. I'm happy with the result though.
Simple applique using scrap fabric and a hand-drawn pattern, and the blanket stitch setting on my sewing machine. This is the kind of project that in and of itself isn't terribly exciting or unique, but it's one I'll love dearly since I know what went into making it.

Truly, it wasn't hard. There is no good reason for the fact that it took me six months, other than that I just kept getting distracted. I informed my dear husband that I'd like to make more. The look he gave me made it clear that he has no intention of spending that much time plucking goose feathers again. Darn. I guess I should give up on the idea of a goose-down body pillow then...


Saturday, October 30, 2010

Happy Halloween!


Here's wishing everyone a safe, fun, and happy Halloween!


==

Details on the costume making-

Cora's is Simplicity 2571. Four pieces, the pantaloons, dress, apron, and hat. I'm pretty sure she's going to wear the pantaloons frequently for every day wear under dresses. Because they please me more than I can describe. I might even make some for myself.


This whole costume was easy to make considering the cuteness factor - no one part was really all that difficult, just a one-piece-at-a-time kind of project. 10 yards of eyelet lace - whew!

Oh, and I should point out - in case you're wanting to call her Little Bo Peep - that she insists she's Mary, from the song "Mary Had a Little Lamb." And she corrects every person that says, "Aww, look at Little Bo Peep!"

As for the sheep in the picture - we just happened to drive by these sheep sculptures while she was wearing her costume yesterday. I couldn't resist the photo op. :-) (The sheep are the creation of artist Jim Dolan of Bozeman Montana. Check out his website for photos of some of his other work, it's amazing!)

===

Chloe's costume is McCalls 2335. She loves it. It was wretched to make. Wrestling a giant, stuffed tail at the sewing machine just isn't fun - especially when said tail is made of slippery layers of satin. The spots were her idea - because dinosaurs certainly had pink, glittery spots, didn't they?

The whole thing is satin lined with fleece. The zipper is hidden under the belly, which is a velcro-fastened flap. On so many levels, I would never make this costume again, nor would I recommend it. But then, maybe sewing stuffed satin just isn't my forte.

Aside from the misery of making it, it turned out pretty darn cute, and she is really happy with the result!


Sunday, May 23, 2010

Sewing for Stress

It's been a long, stressful week. I decided it was time for some late night sewing therapy.

I found this vintage tablecloth at a yard sale a couple of weeks ago. I paid $3 for it.


I'm enthralled with the color yellow right now. The pattern on this tablecloth made me kind of giddy.

Here it is now... one package of seam binding tape and a few easy measurements later.

Isn't the bauble trim fabulous? Yep, I thought so too. :-)


Sunday, January 10, 2010

Holiday friend gifts

Each year, I make something special for a few close friends for Christmas. This year, it was aprons. Because I'm kind of obsessed with aprons, and I think all my friends should be, too. I made quite a few, but only thought to photograph a couple of them. All were these same two styles in whatever funky fabrics seemed appropriate for each recipient. (Sorry for the crappy photos. I was too busy sewing to make time to take nice pictures.)


This was a matching mother/daughter set for a friend and her five year old little girl.


Last year, I made a few recipe books with fancy little scrapbooked recipe cards for each of my personal favorite recipes. One friend in particular really loves hers and uses it frequently so in addition to her apron, she got another 5 recipe cards to add to her collection.


And a few photos of some of the thank-you cards and such that were sent out for all the lovely holiday gifts that we and the girl received: