Showing posts with label crafts. Show all posts

Saturday, October 26, 2013

Happy Halloween!... almost.


 I usually wait until it's actually Halloween to post costume pictures, but seeing as I actually have internet access tonight, I suppose I better make use of it.

And so I present: Halloween Costumes 2013

Pippi Longstocking...

And a very sweet little bride. 


True to character, I have one dressed in lace and satin and the other looking super playful.

The Oldest read Pippi Longstocking recently, and helped design her own costume based on what she read. I love how it turned out, and so does she. She even did some of the sewing this year!

Littlest One really just wanted to be a princess (again) but I refuse to make the same costume twice. (Halloween costume sewing is as much fun for me as it is for them, mostly because I never get to make fun stuff like this in real life.) So instead of princess, she went with bride... which is essentially just a princess in white, with a veil and a bouquet. Works for me, and it turned out gorgeous.

The detail on the dress was the most fun I've had in a long time - I even designed it myself with a lace overlay on the front panel, ribbon woven corset-style up the front, and braid trim along the overlay and around the neckline. It really is a real wedding dress, in miniature.


And of course, the most fun comes after Halloween, when they can dress up as often as they want. Makes all the effort worth it in the end!

Happy Halloween to everyone!

Monday, October 21, 2013

Volunteer Work: Farm style


Sometimes, being homeschoolers offers us some amazing opportunities.
 
This weekend, we took a volunteer job at a local living history museum, demonstrating some of the heritage arts that we do at home. We dressed in costume and sat on the porch of a 100 year old bunk house, where we showed knitting, crocheting, embroidery, and finger knitting.

It was an incredible opportunity for Two Little Girls. For as much time as they spend doing these things as a regular part of life, it was fantastic for them to hear the “oohs” and the “ahhs” of ‘city folk’ as they watched such young girls doing them. For me to be knitting wasn’t anything special. But for folks – kids and adults alike – to see my six and ten year old daughters proficiently creating beautiful, useful works of art was inspirational to some.
 

The girls sat with other kids as they came by and taught them the basics of their skills – Littlest One taught many a young girl to knit a chain by weaving yarn on her fingers, and sent each one away with a small ball of yarn to practice with. The satisfaction she got from sharing her skill equaled the satisfaction of the children learning it.


We taught a group of girl scouts how to knit and crochet, patiently demonstrating and holding their hands as they fumbled through the stitches. A couple were so eager to learn that they sat with us for nearly half an hour, carefully making stitch after stitch across rows. It’s neat to think they may go home with a desire to learn a lifelong skill that was nearly lost to antiquity for a few generations.


When they tired of sitting and doing their needlework, Two Little Girls took turns churning butter from fresh local cream and cleaning apples to be pressed into cider for the many visitors. No matter what they were doing, watching them brought smiles to many faces. To see some of the elderly women that passed through smile so big at my sweet girls having so much fun doing what most would consider work warmed my heart. 


And upon the end of our day, when The Oldest took my hand and swung my arm as she skipped along in her pinafore and bonnet, and she said, “This was such a special day!” That made it all worth the effort we put into it. I love when my girls are able to take pride in this (somewhat crazy) life we live. Not every kid gets to do the things they do here, and while it doesn’t always seem special to them, times like this help them realize they get to experience a lot of things most kids never get to.


The museum will close up soon for the winter, but we hope to continue volunteering our time there next year, sharing the skills we use every day with kids who don’t get to see them often. 

Thursday, October 10, 2013

Ooey, Gooey Homeschooling Awesomeness


 My children, as in all areas of life, are as different as night and day when it comes to school. They each have their strong points and weak areas, the subjects they love and the ones they suffer through... and neither of them match up with anything. The Oldest picked up reading after about two months of instruction. Littlest One is on year two of painstakingly sounding out Every. Single. Word. But where The Oldest still can't always recall that 8x8=64, Littlest One seems to have a knack for memorizing math facts - and even loves to do it. Flash cards thrill her... The Oldest would rather scrub baseboards.

And so, just when I finally felt like had "This Whole Homeschooling Thing" down, Littlest One came along to dash all my dreams of mastery.

But, as I've worked to find ways to get information to stick in the brains of young children, one concept always rings true: if it involves laughter, fun, creativity, or enormous messes, they will undoubtedly remember what they have been taught. The only problem here is that this means that I have to come up with great ideas each week to keep them actively learning. Not always an easy thing to do. We've done "Memory" type games for sight words, online games for learning math facts and phonics, apps on my phone for sight words and for multiplication drills, and I've spent countless nights searching Pinterest for more fun ideas.

Somewhere between a Pinterest preschool activity and my own brain, this amazing little activity came about, and it's one that's cool enough that it deserves sharing.

I wrote the Eight Sight Words of the Week on little bits of craft foam, using a Sharpie. Then I scattered the bits on the bottom of a glass baking dish:


And then - because I was hoping to win the Cool Mom Award for the day, I managed to bring together fun, creativity, laughter, and an enormous mess, all into one activity: I squirted shaving cream all over the words, filling the baking dish til it nearly overflowed.

Then I handed Littlest One a list of her sight words and a pencil, and set her to work. Her job: find the little foam bits with the words on them, read them out loud, then find them on the list and mark them off with the pencil.


It sounds way easier than it really is. I also didn't let her keep the words out when she had found them - I made her put them back in. This meant she was constantly re-finding and re-reading the words.

The other blessed benefit to this activity: it can take at least an hour. Seriously - go get some laundry done, make some dinner.... take a nap, whatever. Your kid will be entertained. I promise.

Somehow, I assumed The Oldest would find this utterly immature and not be interested at all.
 
Clearly, I was wrong. She was desperate to get her hands in that shaving cream. So I wrote out a bunch of her most difficult multiplication and division facts and let her have a go at it.
 
The verdict? Coolest sight word game of the year, so far. The only problem is, now I have to come up with more fun ideas... feel free to hit me up with any you might have!


Wednesday, August 8, 2012

Crafty Kiddos

 Charlotte Mason was a big proponent of teaching kids 'handiworks'. I can see why. If they're working on something, it keeps them sitting. In one place. Without screaming and yelling. And I'm all about that.

It also gives them something useful to do when they otherwise would just be sitting around, like on car rides back and forth to The Big City, daily quiet time, story times, or during a movie.

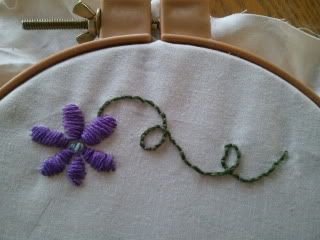
The Oldest has wanted to learn to embroider for a very long time now. I finally got around to teaching her what little I know about it, a simple satin stitch and a chain stitch. She is embroidering the front of a pillow for her favorite stuffed cat, Luna. 

Sometimes I'm amazed at how much patience she can have. Every stitch was carefully placed. She kept the work as neat as a nine year old possibly could, and really stuck with it.
 

Littlest One - being as she is the Littlest One, and therefore must always find a way to do things like her big sister - was taught to finger knit. It's a simple process, though I wasn't sure if she'd be ready for it yet. Boy, did I underestimate her ability! Once she figured it out, she really took off with it.
 
One headband finished for herself, one finished for a friend, and now she's making one for the friend's mom... she has plans of handing out headbands to every woman and girl she knows for Christmas this year.


I love giving them something like this to do. We don't do "paper crafting" very often, because we honestly don't have that kind of time. There aren't construction paper art projects cluttering my fridge and walls, we don't do a lot of gluing cereal and cotton balls to paper for the purpose of calling it school. But these kinds of crafts are useful ones. They can take these skills and turn them into something beautiful and useful, and something to give to someone else. Those are the kinds of crafts I like seeing them learn.

We had a little talk about setting goals as the girls were working. I told them how, when I knit or clean house or anything else, I set little goals for myself. I tell myself "I'm going to finish four inches of this sleeve" or "I'm going to clean for fifteen minutes in the bathroom" before I get tired and take a break. Each of them set a goal - The Oldest to finish all the petals of her flower, Littlest One to finish one headband. When they reached their goal, they got to feel that little sense of satisfaction at having completed something without giving up first. I hope that's a habit they will continue throughout their lives. The tiniest goals set and met will eventually provide big results!

===
While I'm posting pictures, here's a photo of Littlest One's hair wrap. I did them a week or so ago while the girls sat and watched a movie on a lazy Saturday morning. I let them each pick out the colors they'd have, and two charms to hang on the end. Littlest One has a hummingbird and the letter C, and The Oldest has a horse charm and the letter C.


I remember doing these a lot when I was a kid - it was fun to recreate it with them. We didn't knot the whole thing down the way we did when I was young though, these are just wrapped and knotted every so often, so they will come out when they get tired of them. 


Wednesday, May 30, 2012

We have a sign!

I've mentioned before how when we lived in The Big City, we had the coolest neighbors anyone could ever hope for. And now that we've moved away, we're still blessed to call them our friends, though we don't live so close. While we were visiting The Coolest Neighbors in the World one day during Trash Heap Week, I noticed they had this fantastic headboard out by the curb.


I knew it was a treasure. Weathered, worn, and full of character... it just needed a new life. I insisted that my husband put it, along with it's matching footboard, into the back of the truck. And then it sat in our garage for a month while I contemplated exactly what I wanted to do with it.

Somewhere along the line, I ran into this post by Funky Junk Interiors on Pinterest, laying out how to make an 'old' sign. Perfect.


I suppose this makes our farm name really official now. Kind of exciting, eh?

I won't go into detail about how I made it (cooler bloggers have already been there and done that,) except to say that ironing freezer paper stencils onto painted wood didn't turn out to be as great of an idea as I thought it would be. (Hey, it works on fabric. Which is apparently very different than wood. Who woulda thought?) I used a color called "spa blue" for the undercoat, and "cranberry wine" for the top. I wasn't sure until it was completely finished that I would love it, but I do.

Feel free to come visit us. Now that we have a sign, you'll know when you've arrived!


Monday, April 23, 2012

Crochet Pattern: Tri-colored Rose Barrette


Big hair flowers are in, right? This is one of those super-simple, insanely fast instant gratification sort of projects. I whipped this one up in about fifteen minutes for The Oldest to wear at the dance the other night. Pretty sure I could easily make one to match nearly all of her dresses using just my scrap stash, and she'd be thrilled to wear them. In fact, I might make a couple for myself.

And.... I even wrote the pattern out to share with you! Please note: I am not a pattern writer. There's a good chance there are mistakes here. If there are, let me know - I'll do my best to fix them. I just made this up for my own kids, but it was so darn cute I thought y'all might want one too.

Tri-colored Rose 

3 colors worsted weight yarn (I used scraps), size G crochet hook

With Color A:
Ch 8, sl st into 1st ch to form ring.

Rd 1: ch1, 16sc into ring, sl st to 1st ch to join.
Rd 2: ch5 (counts as 1 dc, 2ch) skip next sc, (1dc into next sc, skip 1 sc) around. Sl st into 3rd ch of beginning ch5 to join. (You should have 8 sections now.)
Rd 3: Sl st into 1st 2ch space. Ch 1, (1sc, 1hdc, 1dc, 1hdc, 1sc) into each section. (8 petals.) Break yarn, fasten off.

Rd 4 - with color B: On the back of your work, join color B into base of one of the dc. (Ch 3, skip 4 sts, sl st into base of next dc). Join at beg of rd. (8 base arches.)
Rd 5 - Sl st into 3ch arch, ch1, (1sc, 1hdc, 3dc, 1hdc, 1sc) into each arch. Join to sl st at beg of rd. Break yarn, fasten off.

Rd 6 - with color C: Again at the back of your work, join color C into the base of a center dc of a 3 dc group. (Ch 5, skip 6 sts, sl st into base of next center dc.) Join at beg of rd. (8 base arches.)
Rd 7 - Sl st into first ch5 arch. Ch1, (1 sc, 1hdc, 5dc, 1hdc, 1sc) in each arch. Join to sl st at beg of rd. Break yarn, fasten off.

I used hot glue to attach an alligator clip to the back of the flower. Another option is to use a brooch pin. I found that attaching it slightly off center, on the back of the Color B rds, helped it hang nicely in the hair.

It would be easier to make this smaller (or larger) by either omitting the third color, or following the same pattern and adding another color.

Monday, February 27, 2012

Thrifty Style: "Must Haves"

Have you noticed the new "being thrifty" books on the market lately?

Back when I was a young, first time mom, I learned to be thrifty out of necessity. (Tightwad Gazette, anyone?) Back then, "thrifty" meant clipping coupons for cereal, pairing them with sales, and coming home with eight boxes of Lucky Charms for seventy five cents each. It meant stockpiling Aquafresh when I could get it for pennies, and learning to buy Wal-Mart clothes when they were on the $1 clearance.

Times have changed since then. Financial circumstances aren't so dire, and I've learned a whole lot about how managing health goes a long way toward living frugally. It would appear that most of the "frugal" book writers are in the same place, trading out how-to's on price books for chapters on the basics of gardening, and notes about coupon-clipping for recipes for homemade whole wheat bread. I'm loving that these new books include recipes for homemade cleaners with vinegar and castile soap, instructions for canning tomatoes, and some even have basic patterns for skirts and pants, or beginning knitting instructions. Times are a-changing, I tell you, and it excites me.

But one book I was reading today offered a chapter on "the frugal style" and it about made me snort the coffee I was sipping. There was a list of the Style Must-Haves, things every "frugal" woman ought to have in her closet. Amusingly it was on the same page as an article about finding a great deal on a black and white Chanel suit. (Because we all need one of those, don't we?) The list included things like a 'little black dress'; brightly colored flats; a white button-down shirt; black slacks; a trench coat; and a leather handbag.

Now, we have to realize the ladies that wrote this book must live in some city other than The Big City that we live near. If I showed up to do my monthly shopping at Wal Mart wearing a trench coat, bright red flats, and a leather handbag, I'd have folks gawking openly at me as I perused the dairy section. Reality here - whether it be in our Tiny Little Town or even in our Big City, is that no one needs stuff like that.

So I thought a little bit about my "must-haves". Here are some of the things I can't live without:

*A big, full skirt in a color that goes with anything. Bonus points if it's made from scrap fabric patched together, or a recycled tablecloth or curtains.
*A cozy, homemade cardigan, preferably in some fiber that can be tossed in the wash.
*Comfy rope sandals. I wrote a whole blog in ode to my Gurkees once. They're that awesome.
*Tank tops in every shade I can find on clearance.
*Rubber chore boots that can be hosed off after wading through poo and mud. (I've come to realize the rubber chore boots, often times still laden with said poo and mud, are a regular fashion statement at the market here in the Tiny Little Town.)
*Wool socks, tights, and/or leg warmers. Flannel pantaloons aren't uncalled for.
*A giant bag (mine is hand-knit out of 16 shades of scrap yarn - I like to think it matches everything... or maybe that's nothing?) that will hold the normal purse things as well as snacks, books, a small knitting project, miscellaneous rocks and pine cones, a couple bottles of water, and anything else that Two Little Girls might want to stick in there.
*A floppy-brimmed hat for days when brushing my hair didn't make it on the priority list, or when I want the sun kept out of my face.

So what are your necessities? Do you live in a place where wearing a Chanel suit would make you feel right at home, or would it make you the laughing stock of the local discount store? What is one clothing item you absolutely couldn't live without?


Saturday, February 25, 2012

FO: Vintage Knickers

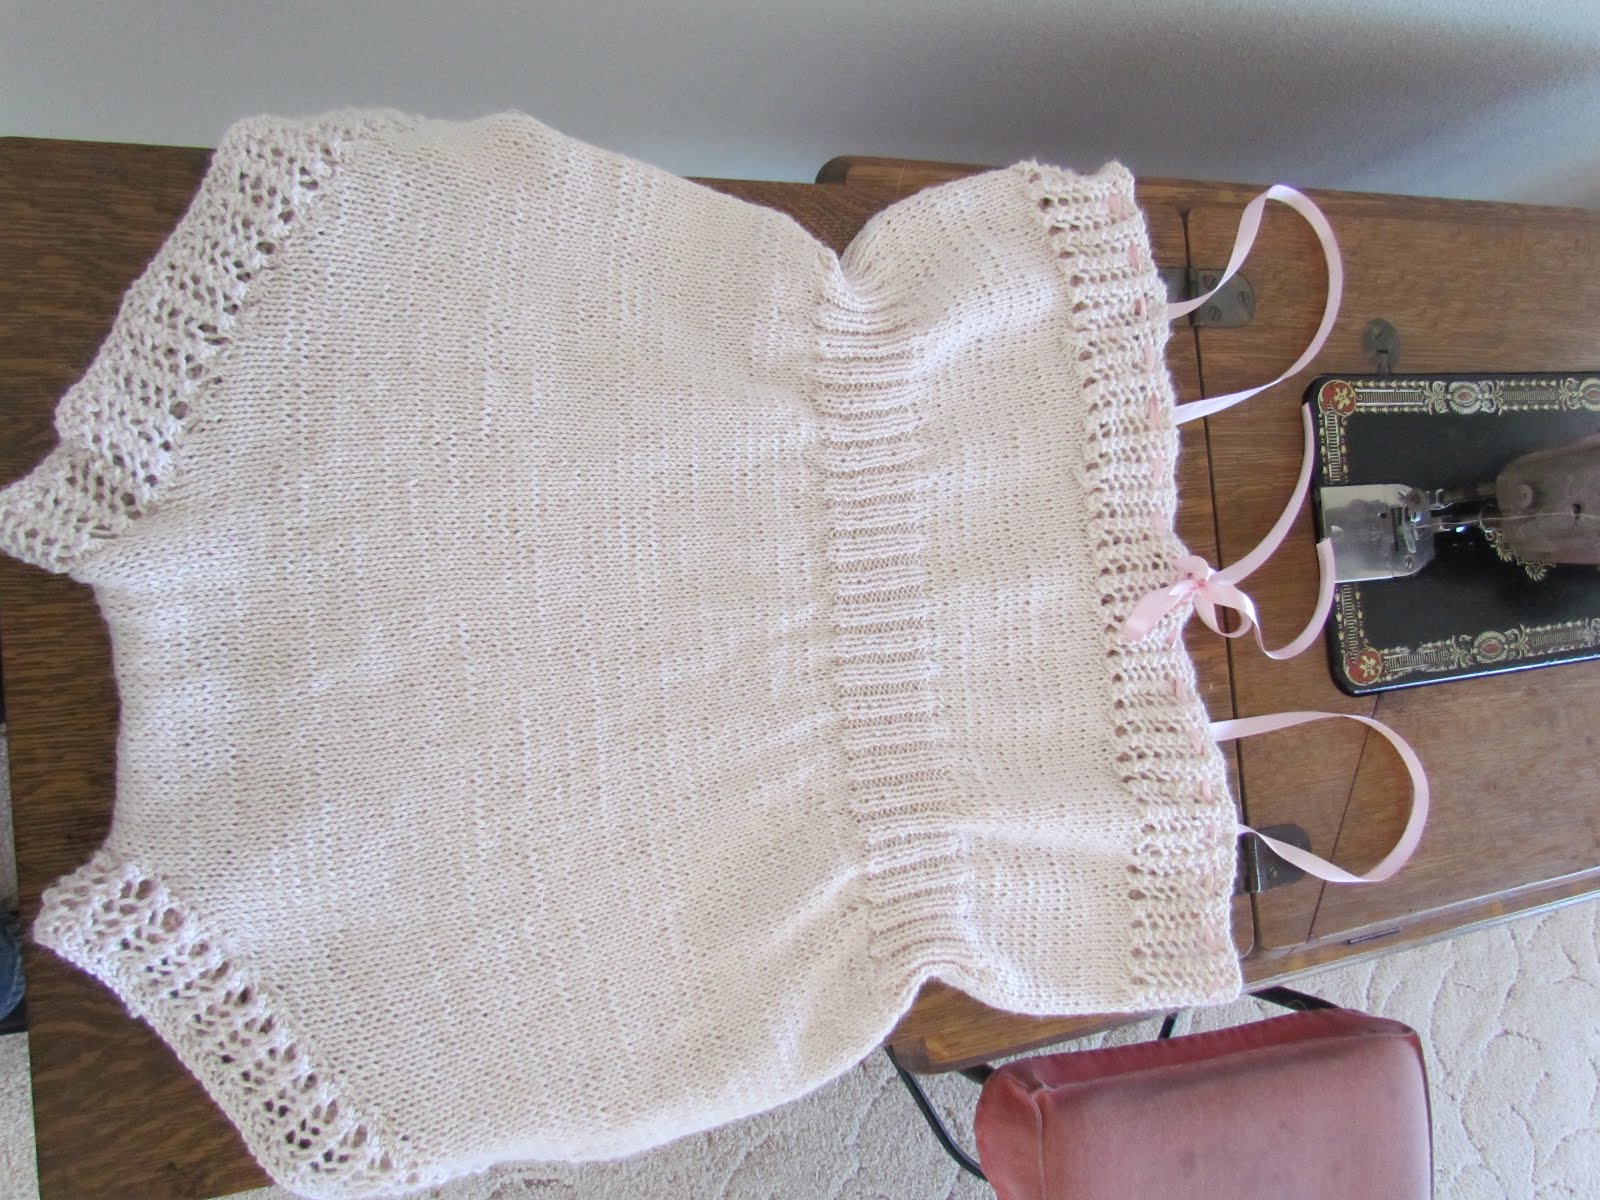
Last summer, I found a pattern on Etsy from a 1930's Vogue Knitting magazine for these cami-knickers:


Have you ever seen anything more adorable?

Of course, they aren't nearly as adorable on me as they are on the gorgeous model, but I love them just the same.


I can't begin to tell you the satisfaction of knitting vintage under-things in alpaca silk yarn, then finishing the garment on an antique sewing machine. And that doesn't even touch the satisfaction of wearing it. Pure luxury, I tell you! Nothing is warmer than alpaca, and nothing is softer than silk. Put them together and it's utter perfection.


Unmentionables were so much more flattering back then. They were made for women who had hips and waists and thighs, not the boyish figures we see modeled nowadays.

I may never wear modern underthings again. To heck with push-up bras and thong underwear, I think we should all demand that vintage under garments come back into style. I guarantee most of us would look better in these than in the underthings that are in style today. ;o)

The details:

Yarn - Blue Sky Alpacas Alpaca Silk, 50% alpaca, 50% silk in color Blush
Needles - size 2
Pattern was one-size, I altered the width just slightly to make it a little slimmer based on the gauge I got with this yarn. Other than that, a perfect, flattering fit.

Sunday, January 8, 2012

Nine! and Slumber Party Photos

Time flies, doesn't it? My sweet Biggest Girl turned nine this weekend! We had three friends over for her first slumber party, and it was a great success.

While Chloe was out of the house, Cora and I decorated the front walk:
And the living room (in an attempt to make it look more festive, since we're moving and every room looks naked right now, save for boxes in every corner.)
With Grammy's help, we made the cake:

And then waited for the birthday girl and her guests to arrive. They were all pretty excited.
Littlest One was excited too.

She enjoyed the first half of the party before going to Grammy's house to spend the night.

We had dinner, then cake and ice cream...
with confetti poppers, because they're just so much fun.
And then opened presents.
Yes, she's hugging a lava lamp.
There was some craziness with balloons..
And then they all got to decorate their own pillowcase with fabric markers.
And since no party at our house is complete without some kind of paint, we did handprints on the backs of the pillowcases.
There were horse-head shaped cookies to decorate,

and a wild game of Twister Hoopla, one of the gifts she received from her friends.
Then we settled down with lights off, and some glow-sticks to keep the fun going a bit longer.

Sleep finally came around 1:00... it was a long, long night. But we survived. :o)

Homemade fried donuts and fruit for breakfast
and then they settled in making beaded bracelets until the mamas came to pick them up.
Overall, it was a really great party! Chloe declared it "The Best Birthday Ever", though I think she's said that about every birthday she's had. But anyhow, I'd call it a success.

Happy Birthday, my sweet Chloe! So glad you had a great time!