Showing posts with label FO's. Show all posts

Wednesday, May 30, 2012

We have a sign!

I've mentioned before how when we lived in The Big City, we had the coolest neighbors anyone could ever hope for. And now that we've moved away, we're still blessed to call them our friends, though we don't live so close. While we were visiting The Coolest Neighbors in the World one day during Trash Heap Week, I noticed they had this fantastic headboard out by the curb.


I knew it was a treasure. Weathered, worn, and full of character... it just needed a new life. I insisted that my husband put it, along with it's matching footboard, into the back of the truck. And then it sat in our garage for a month while I contemplated exactly what I wanted to do with it.

Somewhere along the line, I ran into this post by Funky Junk Interiors on Pinterest, laying out how to make an 'old' sign. Perfect.


I suppose this makes our farm name really official now. Kind of exciting, eh?

I won't go into detail about how I made it (cooler bloggers have already been there and done that,) except to say that ironing freezer paper stencils onto painted wood didn't turn out to be as great of an idea as I thought it would be. (Hey, it works on fabric. Which is apparently very different than wood. Who woulda thought?) I used a color called "spa blue" for the undercoat, and "cranberry wine" for the top. I wasn't sure until it was completely finished that I would love it, but I do.

Feel free to come visit us. Now that we have a sign, you'll know when you've arrived!


Monday, April 23, 2012

Crochet Pattern: Tri-colored Rose Barrette


Big hair flowers are in, right? This is one of those super-simple, insanely fast instant gratification sort of projects. I whipped this one up in about fifteen minutes for The Oldest to wear at the dance the other night. Pretty sure I could easily make one to match nearly all of her dresses using just my scrap stash, and she'd be thrilled to wear them. In fact, I might make a couple for myself.

And.... I even wrote the pattern out to share with you! Please note: I am not a pattern writer. There's a good chance there are mistakes here. If there are, let me know - I'll do my best to fix them. I just made this up for my own kids, but it was so darn cute I thought y'all might want one too.

Tri-colored Rose 

3 colors worsted weight yarn (I used scraps), size G crochet hook

With Color A:
Ch 8, sl st into 1st ch to form ring.

Rd 1: ch1, 16sc into ring, sl st to 1st ch to join.
Rd 2: ch5 (counts as 1 dc, 2ch) skip next sc, (1dc into next sc, skip 1 sc) around. Sl st into 3rd ch of beginning ch5 to join. (You should have 8 sections now.)
Rd 3: Sl st into 1st 2ch space. Ch 1, (1sc, 1hdc, 1dc, 1hdc, 1sc) into each section. (8 petals.) Break yarn, fasten off.

Rd 4 - with color B: On the back of your work, join color B into base of one of the dc. (Ch 3, skip 4 sts, sl st into base of next dc). Join at beg of rd. (8 base arches.)
Rd 5 - Sl st into 3ch arch, ch1, (1sc, 1hdc, 3dc, 1hdc, 1sc) into each arch. Join to sl st at beg of rd. Break yarn, fasten off.

Rd 6 - with color C: Again at the back of your work, join color C into the base of a center dc of a 3 dc group. (Ch 5, skip 6 sts, sl st into base of next center dc.) Join at beg of rd. (8 base arches.)
Rd 7 - Sl st into first ch5 arch. Ch1, (1 sc, 1hdc, 5dc, 1hdc, 1sc) in each arch. Join to sl st at beg of rd. Break yarn, fasten off.

I used hot glue to attach an alligator clip to the back of the flower. Another option is to use a brooch pin. I found that attaching it slightly off center, on the back of the Color B rds, helped it hang nicely in the hair.

It would be easier to make this smaller (or larger) by either omitting the third color, or following the same pattern and adding another color.

Saturday, February 25, 2012

FO: Vintage Knickers

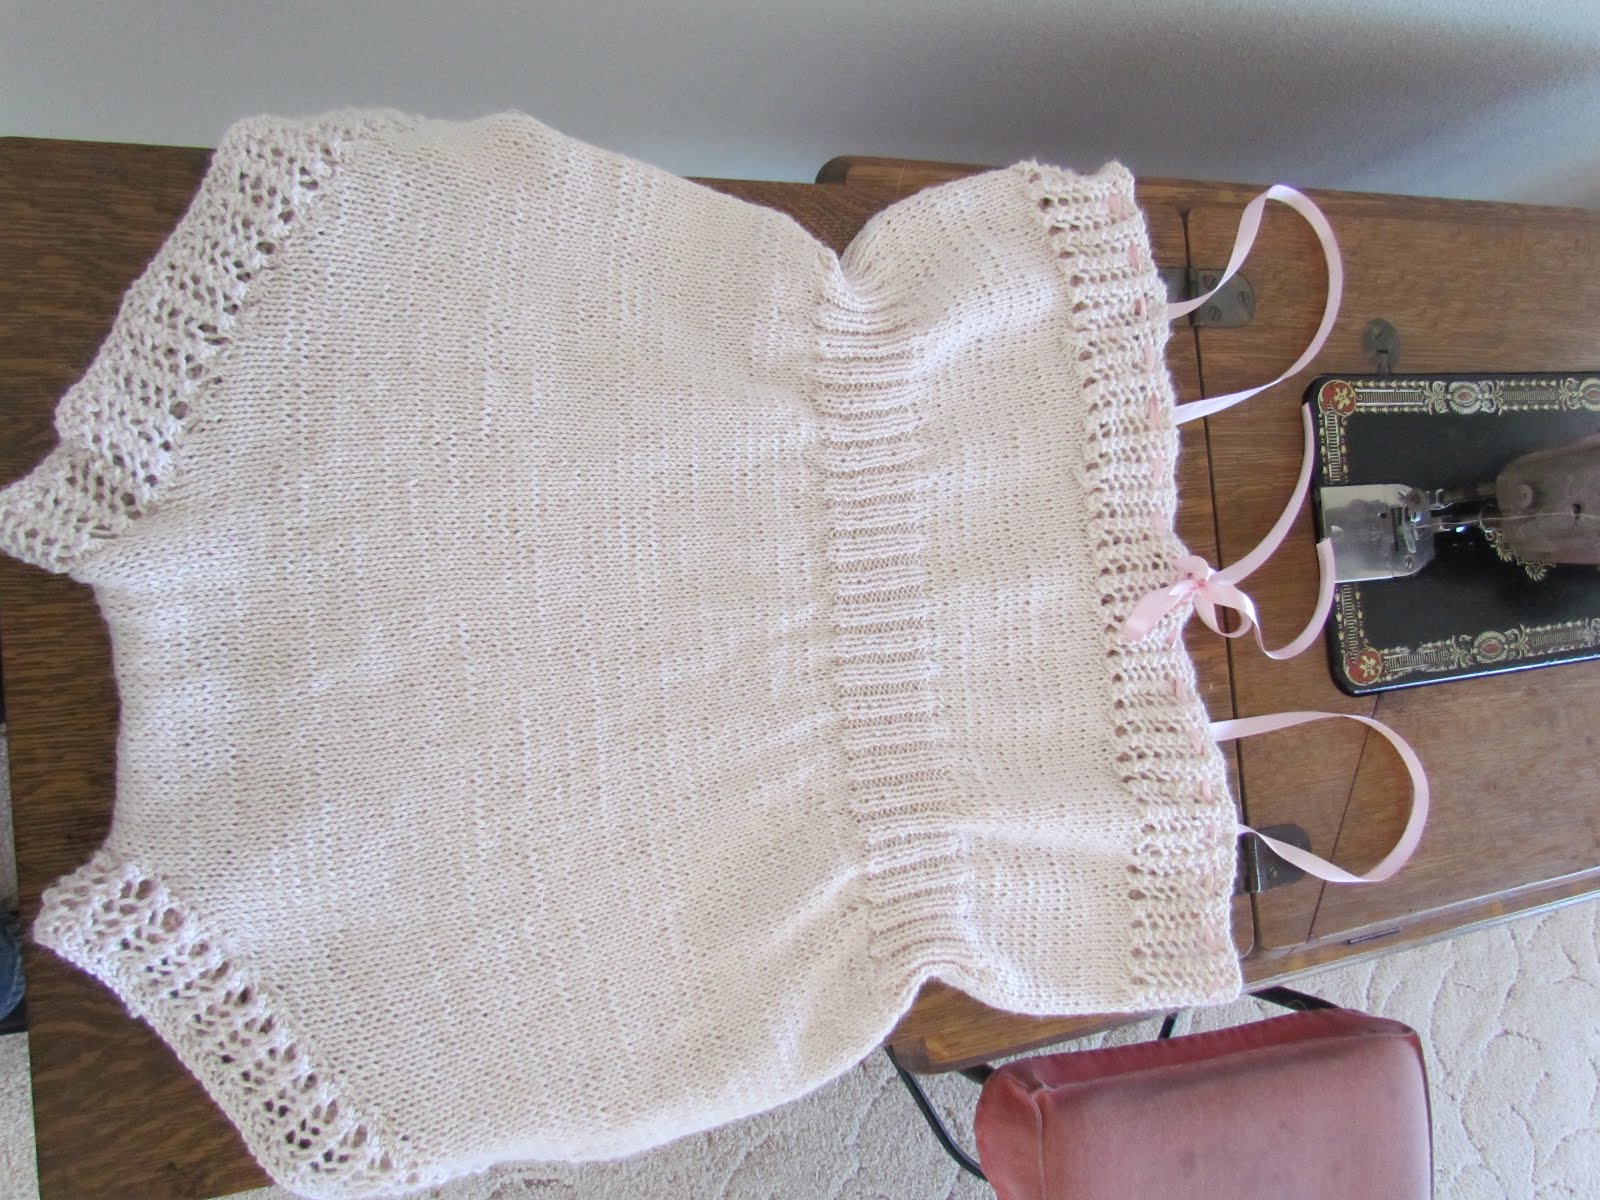
Last summer, I found a pattern on Etsy from a 1930's Vogue Knitting magazine for these cami-knickers:


Have you ever seen anything more adorable?

Of course, they aren't nearly as adorable on me as they are on the gorgeous model, but I love them just the same.


I can't begin to tell you the satisfaction of knitting vintage under-things in alpaca silk yarn, then finishing the garment on an antique sewing machine. And that doesn't even touch the satisfaction of wearing it. Pure luxury, I tell you! Nothing is warmer than alpaca, and nothing is softer than silk. Put them together and it's utter perfection.


Unmentionables were so much more flattering back then. They were made for women who had hips and waists and thighs, not the boyish figures we see modeled nowadays.

I may never wear modern underthings again. To heck with push-up bras and thong underwear, I think we should all demand that vintage under garments come back into style. I guarantee most of us would look better in these than in the underthings that are in style today. ;o)

The details:

Yarn - Blue Sky Alpacas Alpaca Silk, 50% alpaca, 50% silk in color Blush
Needles - size 2
Pattern was one-size, I altered the width just slightly to make it a little slimmer based on the gauge I got with this yarn. Other than that, a perfect, flattering fit.

Monday, December 26, 2011

Silhouette Pillows


Now that Christmas is over, I can show you the picture of my Mama's Christmas gift.


Silhouettes of the girls, on pillows.

I saw the idea on Pinterest (imagine that) and tested a few ideas out before finally figuring out how to do it. Mostly, I thought it would be lovely to applique them on, and then realized there was no way I had the skill to applique around tiny noses and lips. So I went with iron-on transfer paper. It made the whole thing easier, and the lines much clearer. The silhouettes are done in a dark blue bottom-weight cotton and the pillow cases are muslin (since I was going for a homespun, country sort of look.)

For the pictures, I just took side profiles pictures of the girls, printed them at out as 5x7's and cut them out. The hardest part of that was figuring out how to style their long hair so that it still looked like them when I cut it off at the shoulders. Ponytails seemed to be the best option. Then I pinned the cut out photo to the back of the transfer paper once it was ironed onto the blue fabric. I was able to cut the fabric easily with the transfer paper, as it added stability. A good, sharp pair of scissors is a must for this project.

I'm really happy with how they turned out, and really would like to make some for myself, too. And my mama seemed happy to receive them, so I think we can call this project a success. :o)

Saturday, December 24, 2011

Chemises and Pantaloons

New pajamas are the customary Christmas Eve gift at our house. Usually it's something store-bought, but I found this pattern and just couldn't not make them.


Chemises and pantaloons in the style of late 1800's pioneers.


The construction is genius, with a drawstring neckband that grows with them and plenty of extra length and width. The pantaloons have three extra pleats sewn in - just let out a pleat, and you get an extra two inches. I sewed in an extra four inches of waistband in each pair, so that I can let out the waist as needed. I imagine these will be worn out long before they're outgrown!


I figured I'd be more excited about the final product than the girls were, but they actually seemed really pleased, especially when I explained the history behind them.


Sewing notes: This pattern was super easy. Total was two hours for each gown/pant set if sewn on the electric. Since my electric spazzed halfway through the first set, much of the sewing was done on the Singer treadle, which nearly doubled the sewing time. After the first set, I changed a bit on the construction of the pantaloon ruffles, just for the sake of my own sanity. Flannel maybe wasn't the easiest fabric to work with, but it worked well enough.

Friday, December 16, 2011

Makin' Stuff

Since I'm no longer sleeping for any decent length of time, I have plenty of time to make things:

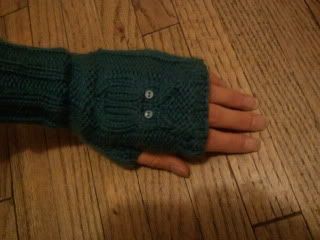
"Give a Hoot" fingerless mitts


Altered from the pattern for Give a Hoot mittens by Jocelyn Tunney. Sorry for the phone-cam pictures, I was lazy. The actual color is really a pretty bright turquoise. Using yard-saled wool yarn and a free pattern, the total cost for this project was less than one dollar. Sweet :o)

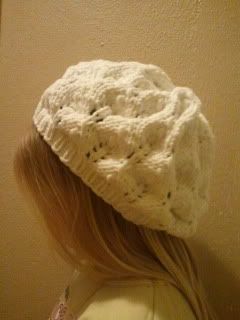
Leafy-lace Slouch Hat


Modeled by the youngest - it's my size, but she couldn't get my phone cam to work to get a pic of it on my head.


Pattern is called Lacy Leaf Souch (misspelling copied from the designer. Can way say "oops"?) I had to essentially rework the pattern, it wasn't a very good one and I was/am really disappointed with the hat in general.

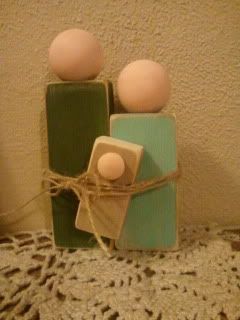
Saw this sweet nativity on Pinterest. (Oh Pinterest, how I love thee. Seriously, if you aren't using it yet, you should be. It's the best way to waste time I've ever found.)

Directions can be found here. I found a wood carver's kit at Michael's for $5.99 that included enough wood to make two sets. The head beads were separate, and the tiny head was a wooden plug leftover from a recent furniture purchase. Quick and easy to make, and I really, really love it.

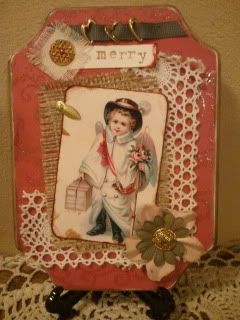
And a fun little mixed-media collage on a wooden plaque, all stuff I had on hand and a graphic printed from The Graphics Fairy. The sweet li'l angel boy makes me smile.


Wishing a fun holiday crafting season to all my fellow crafters, and a very Merry Christmas to everyone. Hope you are all enjoying it much as I am!


Tuesday, December 6, 2011

Hand Dying with Black Walnut Ink

Remember the quill and ink project? Well, we had some (quarts of) leftover black walnut ink, so I used it for another quick project:

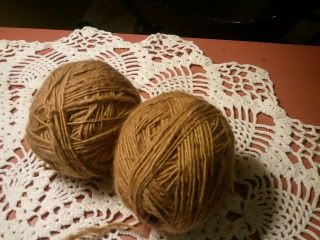
I hand dyed some hand spun yarn.


I spun this yarn a couple of years ago and it sat undyed in a basket for two reasons:
a) I was scared of dying yarn
b) It's really, really not very well spun. There's a serious learning curve to spinning. This is only about my third attempt.

I learned that dying isn't really hard at all, doesn't take as much time as I was expecting, and that the satisfaction of having 130 grams of hand spun, hand dyed yarn is worth the effort.


The process was simple: I tied the skeins here and there with scrap yarn and dampened them, then put them in the room temp ink/dye in a large pot, and heated it to nearly boiling. Then I turned off the heat and let it sit overnight, using a wooden spoon to occasionally move it around gently and press on it to get the dye to saturate well. In the morning I rinsed until the water ran clear, then hung them to dry.

I'm thinking I'll knit up a shawl of some kind with it, something to embrace the imperfections (and there are a lot of them!) of my first fingering weight hand spun yarn. I'll let you know what I come up with... might be awhile before there's time for that. :o)

*Note: black walnut ink also works beautifully as a wood stain. I stained the borders of a little Christmas plaque I made, and it has a really beautiful color to it. This stuff is awesome, I tell ya. Sure wish black walnuts grew wild where we live... guess we'll have to go back to Missouri sometime to get more!

Saturday, November 26, 2011

Knitting Bits: A Rooster That Won't Attack

The girls still talk about Mr. Tweets almost every day. They really miss him, and will tell anyone who will listen all the happy stories about him. They end with, "Yeah, and then Daddy killed him, 'cuz he got mean." That's usually enough to render a look of mild shock on the face of whomever they are speaking with.

Anyway, I've always wished I could bring him back as he was before he got mean, and as I was surfing Ravelry one day, I found the perfect solution: The Knitted Chicken.


He won't attack. In fact, he'll even cuddle if you want.


I made the tail feathers a bit larger than the pattern called for, and crocheted an edge to make them seem more "rooster-ish."


And I crocheted some poofy feathers on top, since our mean ol' rooster was a Polish show breed.


I'm not sure which girl will get him, but he'll be a Christmas gift they'll likely both get a giggle out of.

Pattern: Spring Chicken by Jacqui Turner
Yarn: Scraps of black and white held together
Needles: size 10, and H crochet hook when needed

Saturday, November 19, 2011

FO: The Just Plain Sweater

I suppose for every successful knitting project, there must be at least one unsuccessful one.

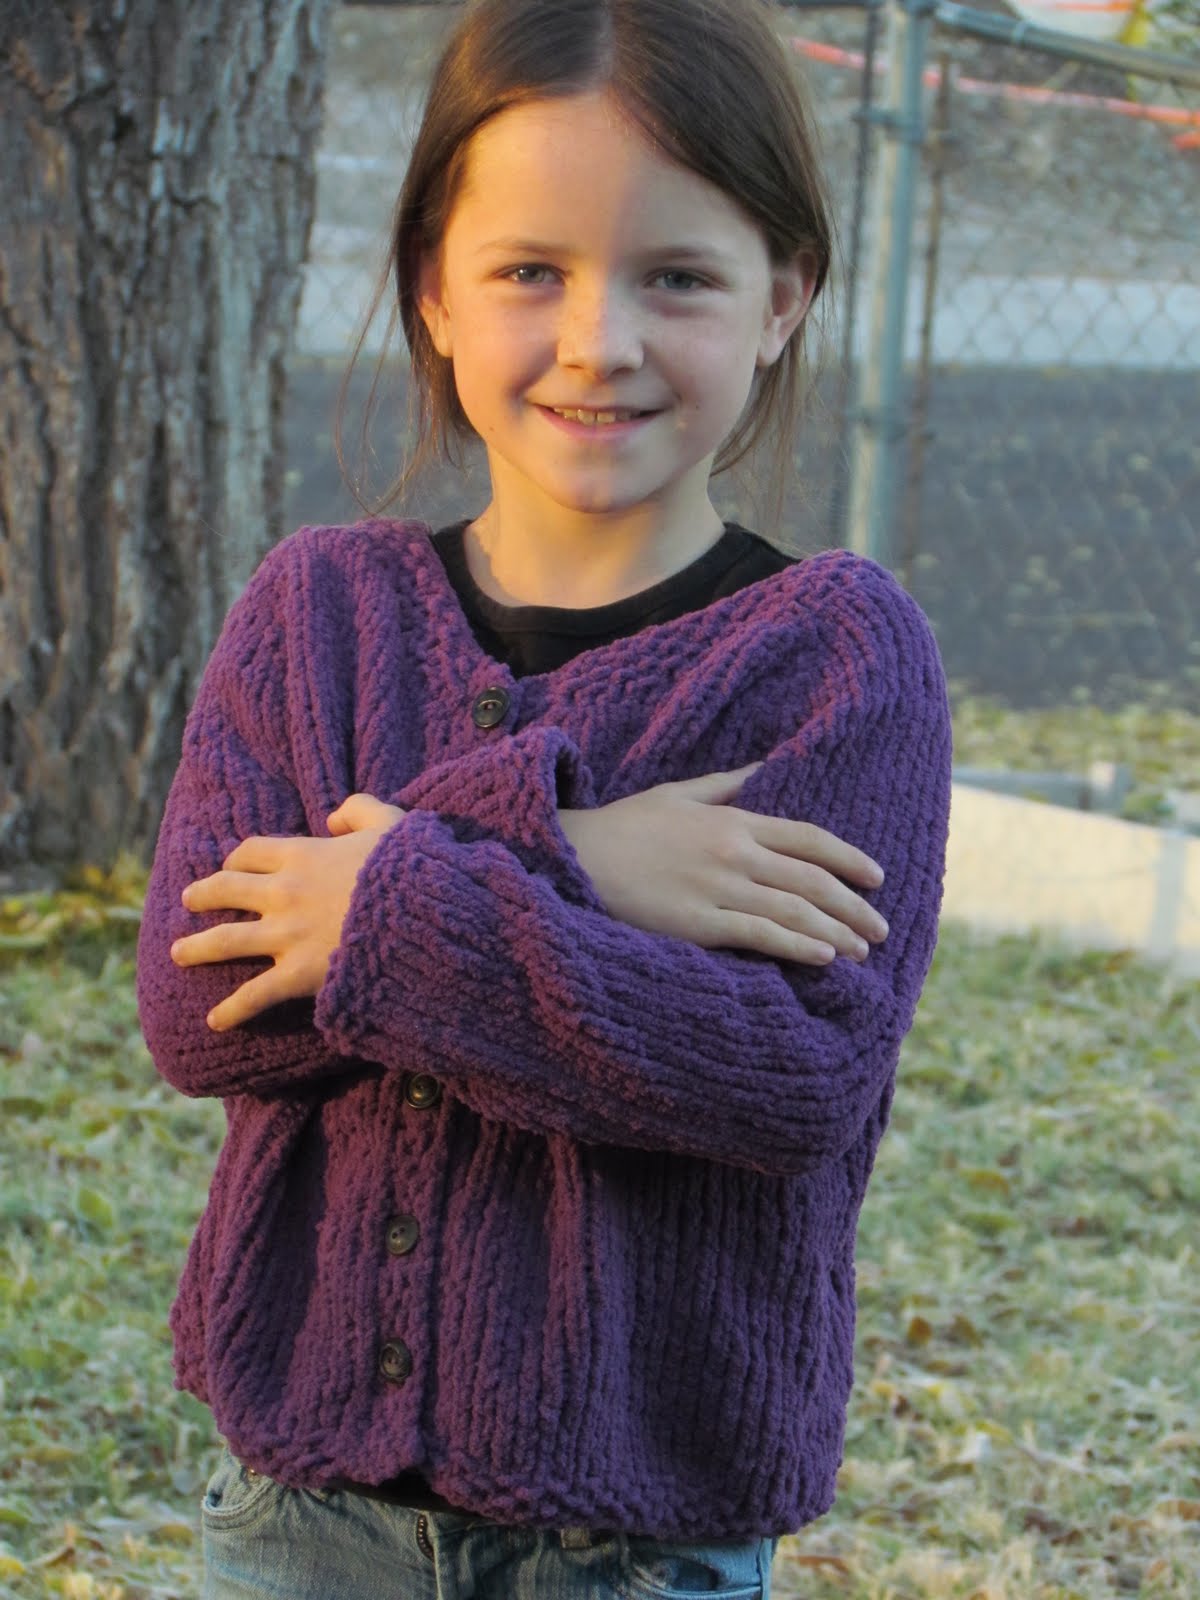
I finished The Oldest's "Just Plain" sweater more than a month ago. It's hung on the mirror in my bedroom since then awaiting buttons. After seeing how it came together, I had no motivation to bother with sewing buttons on, but she finally insisted. She selected six mismatched black vintage buttons from the button jar. And now there is a finished product.


Mostly, I hate everything about it. I really don't like purple. I can't stand this flimsy chenille yarn. The sweater doesn't fit nicely at all, being far too wide around. And I even somehow managed to make the buttonholes crooked, because I'm awesome like that.


So it's not the prettiest sweater I've ever made. The up side is that she doesn't seem to notice the awkward fit, or the crooked buttons. She just feels the softness of this wretched yarn, and sees a shade of purple that makes her heart go pitter-pat. So I guess it's not a total failure.


Monday, November 14, 2011

A Love Story: A Girl and her Yarn.

I feel compelled to tell you my happy knitting project story. It's been a long time since I finished a project I was so darn smitten with. This story is far too long, considering it's about yarn. But hey, at least there are pictures.
===

When I take a trip now, instead of buying souvenirs that are going to sit on a shelf and collect dust (because I have too many of those already!) I try to buy a ball of yarn. It turns into something useful, and each time I use it, I have a chance to look back on the trip fondly.

So when we were in Birch Tree, Missouri (population 600-something) I found a local yarn store called The Twisted Thread.


The fact that there was a local yarn store at all in a teeny little Ozark town thrilled me. Mostly, she carried Cascade products, which I can easily buy at home, and aren't all that exciting to me. But! There was this shelf! A shelf of gorgeous, hand dyed (and even some hand spun) yarns! Colors galore, I tell you. But I knew just what I was after. I wanted a ball of hand dyed yarn that was going to remind me of the amazing fall colors of the Ozarks.


And lo and behold, there it was, the "Fall" colorway. Sumac red, Sassafras orange, the gold of hickory and dogwood. It had all the colors of the fall I was so enthralled with there in Missouri. And it was hand dyed by someone local to the Ozark region. And it was cashmere.

So anyway. Enough about the yarn, with it's gorgeous drape and ultra-soft feel and.... Right. So anyway.

I bought my ball of yarn, finished enjoying the fall in Missouri with my sweet grandmother, and came home to start looking for the right pattern. I knew I wanted a shawlette/kerchief. You can't do too much fancy lace work with hand painted yarn, so I was looking for something simple to show off the pretty colors. I looked for over two hours at Ravelry's options, was about to shut off the computer and give up completely, when I saw Simple Things.

The name hooked me first - Simple Things are what I live for. I looked at the pattern some more. It was named after a quote from Laura Ingalls Wilder! Our trip included our stop at Laura's home! It was clear to me then, this project was meant to be.

And so I knitted it. And lemme tell ya, knitting with cashmere (even just 10% cashmere) is a pleasure every knitter should experience at least once. This yarn is like butter, I tell you. It took a couple of weeks, but now I have this piece I am just utterly tickled with.


Oh my. Just look how those colors melt together, and yet still stand out from one another. I am completely sold on hand-dyed.

The shawl is hanging in my hallway, when I'm not wearing it. I get a lot more satisfaction out of it when I walk by it forty times a day than I would if it were hanging in my closet. It won't stay there forever, but at least for awhile. I'm calling it part of my "fall decor".


And so goes the story of a girl and the yarn she fell in love with. I love stories with happy endings. :-)

===

**Note: The picture above the pegs is the painting of Laura's house that my grandmother gifted me. Isn't it so pretty?

**Another note: check out Morandia's MIB Fibers if you want your own ultra-soft skein of cashmere/merino yarn. I'm sure she can help you out.

Monday, October 24, 2011

Rawr!

I'm loving that it's getting dark so early these days. There's no time for gardening after dinner any more. Instead, there's an hour of dark before bed, time spent in the living room with my girls. Last night they ate popcorn and colored, while I read a story out loud and knitted. An evening like that affords its own sense of peace.

===
I keep seeing dinosaur hats on Ravelry and in friends' blogs, and decided it was time to go ahead and make one.

Chloe is modeling it, but I made it for a friend of Cora's for his fourth birthday. No pattern used, one wasn't really needed. More details on my Ravelry if you want to make one.

After Chloe saw it she asked, "Do you think there might have been pink and purple dinosaurs, too?" Add a pink and purple dino hat to my list of things to make. :-)

Monday, September 12, 2011

Fall Dresses for Little Girls

I'm still on Housework Hiatus.

I finally gave in a bought Little Girls, Big Style by Mary Abreu. I've been eying it for some time now at the local fabric shop. And then I used it to make some dresses for Two Little Girls for fall.

Cora's is the Knotty Apron dress - an attached faux apron and knots instead of buttons on the straps. Love how it makes her look like a little peasant girl.


Chloe's is the Pocket Pinafore dress. I had to alter the pattern up a couple of sizes - the book only goes to a size 6. The straps attach with suspender clips.


I love the book, and highly recommend it. These patterns are super simple - primarily rectangles cut and sewn and gathered. Anyone who can sew a straight line could make these outfits without much difficulty. I will say that the amount of fabric called for was way more than what I needed. I have tons of leftover fabric.

The best thing to do with fabric leftover from little girl dresses?


Make doll clothes, of course!


I used an old McCall's doll clothes pattern, altered a bunch, to make exact replicas of the girls' dresses. Basking in the glory of being a mom to little girls. :o)

Friday, September 9, 2011

FO - Flowers of Fall


This whole homeschooling-homesteading mom thing is really putting a damper on my love for making things. I vaguely remember having time to knit, once upon a time ago, but it hasn't happened any time lately.

With the cooler fall weather settling in, I finally put my foot down and made some time to do a bit of knitting. I rebelled against the housework, even threw the to-do list in the trash. Then I poured myself a glass of wine (at 3:00 in the afternoon) and camped out in my favorite Adirondack chair beneath the shade of the elm tree in the front yard. It was lovely, and so very needed for my sanity.

And the product of my relaxing afternoon made it all the more satisfying:

Flowers of Fall hat by Brownie Knits


I love giant flowers on Little Girl heads. Makes me wish I was four so I could rock the giant flower look.


Monday, June 13, 2011

Faux-fossil Memory Game


I love playing homemade games. It feels organic and old fashioned, and I like it. My kids like it too - there's a satisfaction in knowing they're playing with something they made, not a kid working in a sweatshop in some foreign country.

This is a project I made up myself. We do a lot of fun projects that I read about in books and online, but it's not often I come up with something on my own that I think is worth sharing. Enjoy!

Today's project: Fossil Memory


We started with homemade playdough, colored with Kool-Aid.


2 cups flour
2 cups salt
2 Tbsp cream of tartar
2 cups water
Kool-aid packets

Mix together all the ingredients except the Kool-aid. Add more water or flour as you go, you want it to be the consistency of play dough. Divide the dough into six balls - if you have six colors of Kool-Aid. Knead the Kool-Aid into the dough. Best do this outside - the smell of the Kool-Aid gave us headaches after awhile. You could also use food coloring, and avoid the headache.

Put your dough in plastic bags and set aside while you...

Go on a nature walk.


Check out your back yard, or the neighborhood, a park, or wherever. Add interesting things to your basket as you go, so long as they are less than 2" in diameter. We ended up with flowers, leaves, rocks, shells from our collection, a pine cone, a piece of bark, etc. We made ten sets of memory stones, but I suggest finding more than ten things - some don't make as nice of prints as you'll hope.


Bring your nature back to the table, and divide each color of dough into four equal pieces. Roll them into balls, then smash them down so they look like flat stones. In each piece, press one of your nature objects, leaving a "fossil" imprint. Make two of each print, but make them on different colors. Otherwise it's too easy to match them!


Let the "fossils" dry all day (and all night, if needed.) Be sure to turn them every so often so both sides are getting air.

Then, lay them out in a square and take turns trying to match fossils.


Fun stuff, huh?

Other thoughts and ideas:

If you need it to be more difficult, make them all the same color. This difficulty level is perfect for my three year old, a little to easy for the eight year old.

Consider making a set for each season, based on the changes you see in nature. Fall would be great for harvested veggie bits, seed pods, etc. Winter has acorns and feathers and berries, and spring is full of all kinds of natural bits.

Or, make a set for different areas. This project would travel nicely, and I look forward to making a set of stones the next time we go camping. Just add water, find nature, and away you go!

The dough would roll out nicely into a sort of plaque, where kids could press all the little bits of nature they come across and make a nice decoration for a table top or a wall.

Have fun!